Spot Welds with a MIG Welder? Factory Quality and Super Easy!
If you’re going for that factory original look but need to replace panels with stamped new ones you’ll need to recreate the spot welds. Simple enough if you have a resistance spot welder but most guys don’t have one in their home shop and they can get pricey for an individual user.
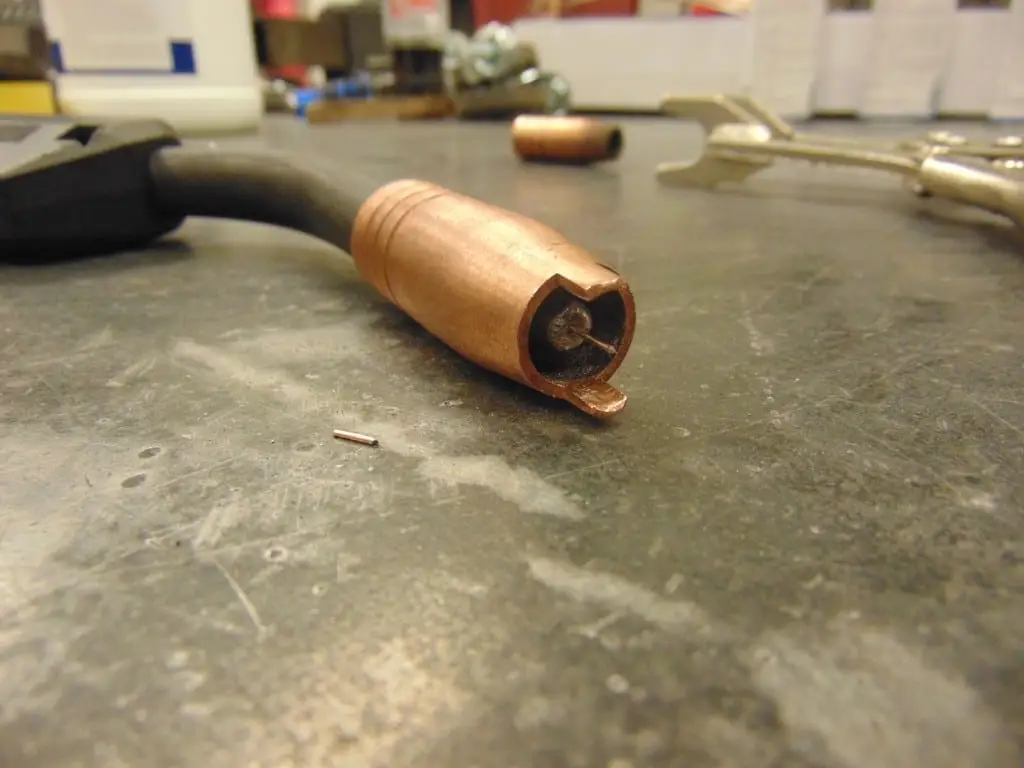
Now there is an easier way to recreate those spot welds using your MIG welder and the help of the Eastwood MIG Spot Weld Kit. This, easy to use and affordable, kit is a perfect alternate to an actual spot welder, with the added bonus of only needing access to one side of the panel. A convential spot welder requires contact to both sides of the panels. This kit is compatible with all MIG welders that use a Tweco style torch, not just Eastwood Welders.

This kit includes a specially designed torch nozzle, a pair of locking clamps, and two drill bits. This is all you will need to recreate a factory like finish to your project.

To set your MIG welder up with the kit all you have to do is unscrew the nozzle and screw on the spot weld nozzle, its that simple.

Start by lining up the two panels to be welded and make a mark where you want them to sit as well as where you want the weld to be. For large sections use a straight edge or a ruler and mark off all the weld locations with equal distance. Once you make the first weld there is no going back to mark and re-measure. It is very difficult to drill holes through only the top panel. After the panels are marked, separate them and drill holes only in the top panel. Only after all the holes have been drilled can you clamp them back together.
Extra Tip: To make sure your spot welds are perfect every time, get two pieces of scrap metal that are the same thickness as your project. Drill holes in one piece and practice a few welds. This will help you dial in your welder to the perfect settings. This will also give you a few extra attempts to get the welds to sit flat on the panel. You wouldn’t want to go back and grind out an ugly weld on your project.

With the two panels clamped where you want them take the nozzle of the welder and set it against the top panel between the openings in the clamp. When you begin to weld make sure the first point of contact is with the bottom panel. If at first the the weld arcs to the outside of the drilled hole it may block off the opening and never make contact with the lower panel. If this happens you will need to grind the area down and drill a new hole and try again.

Start the weld and hold for about 2 seconds, any longer and a puddle will build and the weld will not end up flat on the panel. You want to have amperage of your welder set about 25% higher than you normally would for the thickness of metal you are welding. This allows the weld to penetrate into the second panel ensuring a strong weld.

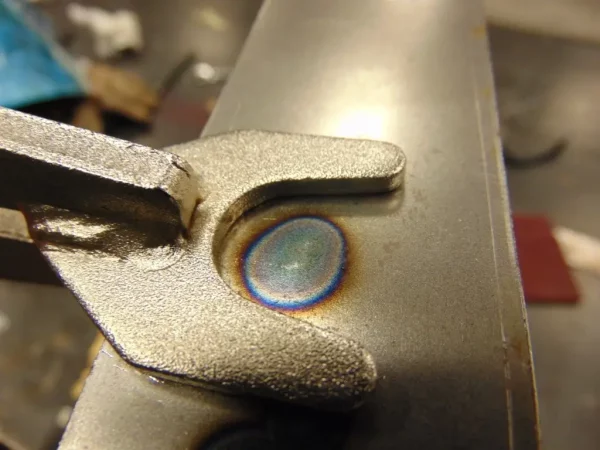
Here is the finished product, aside from a little slag that can easily be sanded off, the weld sits flush with the top panel. Shown below; I made sure to check the underside of the panel to make sure there is a discolored ring directly below the weld this verifies that a good strong weld was made.

Using the Eastwood MIG Spot Weld Kit is the best way to achieve factory looking spot welds at home using only your MIG welder. This kit will save you time and money allowing you to get that project done and on the road.


