Glass Polishing Windscreen Kit
S138£17.99
Number One selling DIY Kit.
✔️ Easy to use with an electric drill.
✔️Suitable for any glass surface including toughened and laminated glass.
✔️ Removes wiper blade damage, superficial scratches, water damage, scuffs, chemical stains, and acid etching.
✔️Improves glass clarity and smoothness and helps to maintain its original look.
In stock
Polish away light hairline scratches, scuffs, surface marks, water marks, mineral deposits
Ideal solution for DIY repairs Designed to be used with an electric drill recommended of 2000rpm
Can be used on any type of glass surface (including toughened glass) Comes with easy to follow step by step instructions
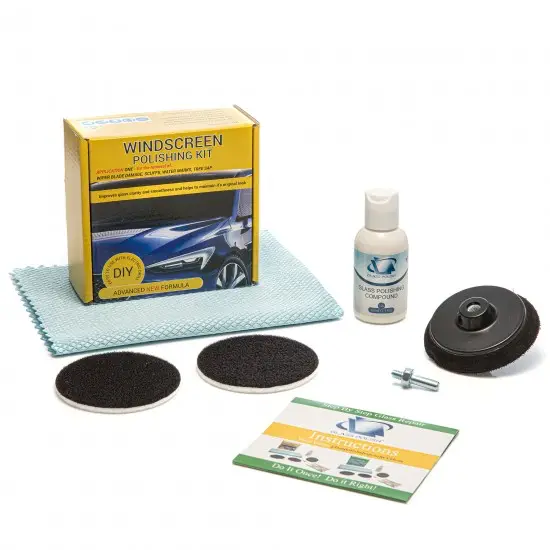
1 x Hook and Loop Backing Pad M6
1 x Universal Drill attachment
2 x Felt Polishing Pads
1 x 50ml GP-PRO Glass Polishing Compound
1 x Microfibre Cloth / S size
1 x Step by Step Instructions
INSTRUCTIONS
Step 1 – Cleaning Make sure glass surface is clean, if it’s not clean use water and the microfiber cloth supplied or soft paper towel to thoroughly clean the glass. Ensure that the glass is checked for any exisiting damage. Unless you are working on toughened glass, if the glass has cracks or chips the repair work may cause the glass to the crack further or break.
Step 2 – Backing Pad Assembly Screwin the backing pad spindle to the back of the backing pad, and then attach the backing pad to a drill. Frost recommends work with an ordinary corded electric drill operating at a speed of 1500-2000rpm.
Step 3 – Polish Pad Assembly & CompoundAttach the velour felt polishing pad to the backing pad, with the back velour side facing the pad and the white side exposed. Add half a teaspoon of glass polishing compound to the middle of the pad.
Step 4 – Glass Polishing StageHold the pad flat against the glass and start the drill. Keeping the pad flat, move slowly from left to right, up and down. Keep a firm, even pressure as you move the pad over the glass. Continue polishing until the slurry is dry and add a small amount of water to the pad or glass and repeat this process as many times as necessary until the glass is visually clear and the damage removed.
Step 5 – Final Clean and Inspection Wipe the surface clean and inspect carefully. The glass surface should now be crystal clear. If this is not the case, then repeat step 4 and check again. Alternatively, if the scratch has not polished out, it could be because the scratch is too deep for this non-abrasive process.
| Weight | 0.4 kg |
|---|
Only logged in customers who have purchased this product may leave a review.
Reviews
There are no reviews yet.