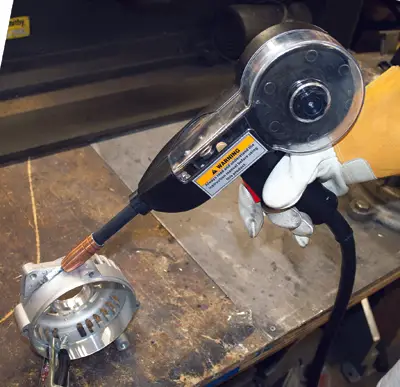
If you decide to use a spool gun with your MIG welder, it is important to understand how to properly use one as to not impair the weld. In this tutorial, we explain exactly why spool guns are important and how to thread a welding wire through one.

The Spool Gun
Before using the spool gun, it is first important to understand that the spool gun is recommended primarily for use with welding aluminum materials, not mild or stainless steel as those metals can contaminate the liner of the gun. Also, while using a spool gun is not necessarily required for welding aluminum, it is highly recommended. If you avoid using a spool gun with your MIG welder, you may run into the following problems:
- Poor quality weld from previously used wires that have contaminated the aluminum wire.
- Feed problems caused by the soft aluminum wire being improperly pushed through the standard MIG gun.
- Feed problems resulting from improper contact tips as standard MIG welders typically use tips designed for steel and other ferrous wires.
Now that you understand more about the usage of a spool gun, it is time to thread that welding wire through your spool gun so you can start welding aluminum.
Threading the Welding Wire
The first step to threading the welding wire through your spool gun is to turn off the welder, and unplug it from its power source. Set the switch above the MIG welder’s drive motor to the spool gun setting, and remove the thumb screw and clear plastic wire spool cover. Next, remove the thumb screw and spring tensioner holding the wire spool on, and place the wire spool on the spindle. Replace the thumb screw with your spring tensioner, and tighten it until the spool has some tension on it. Before you begin to feed the wire, loosen the brass tensioner thumb screw until it allows the space for feeding the welding wire through the drive roller grooves.
Now that the brass tensioner screw is loosened, start feeding the wire by hand from the spool into the inlet guide and past the drive rollers into the wire inlet. Tighten back up the brass tensioner thumb screw until it applies just a light pressure onto the welding wire. Be sure not to make it too loose but not too tight either as that can deform the wire and cause feeding issues. Now, remove the nozzle and contact the tip before placing the wire spool cover back on. Once the cover is back on, plug in the MIG welder and turn it on. Trigger the spool gun so that it feeds the wire and adjust the brass tensioner screw so that the wire does not slip at all. Finally, replace the contact tip and the nozzle, and now your spool gun and MIG welder are ready to use.
To learn more about MIG welding and for more automotive articles, visit our Technical Articlespage.


